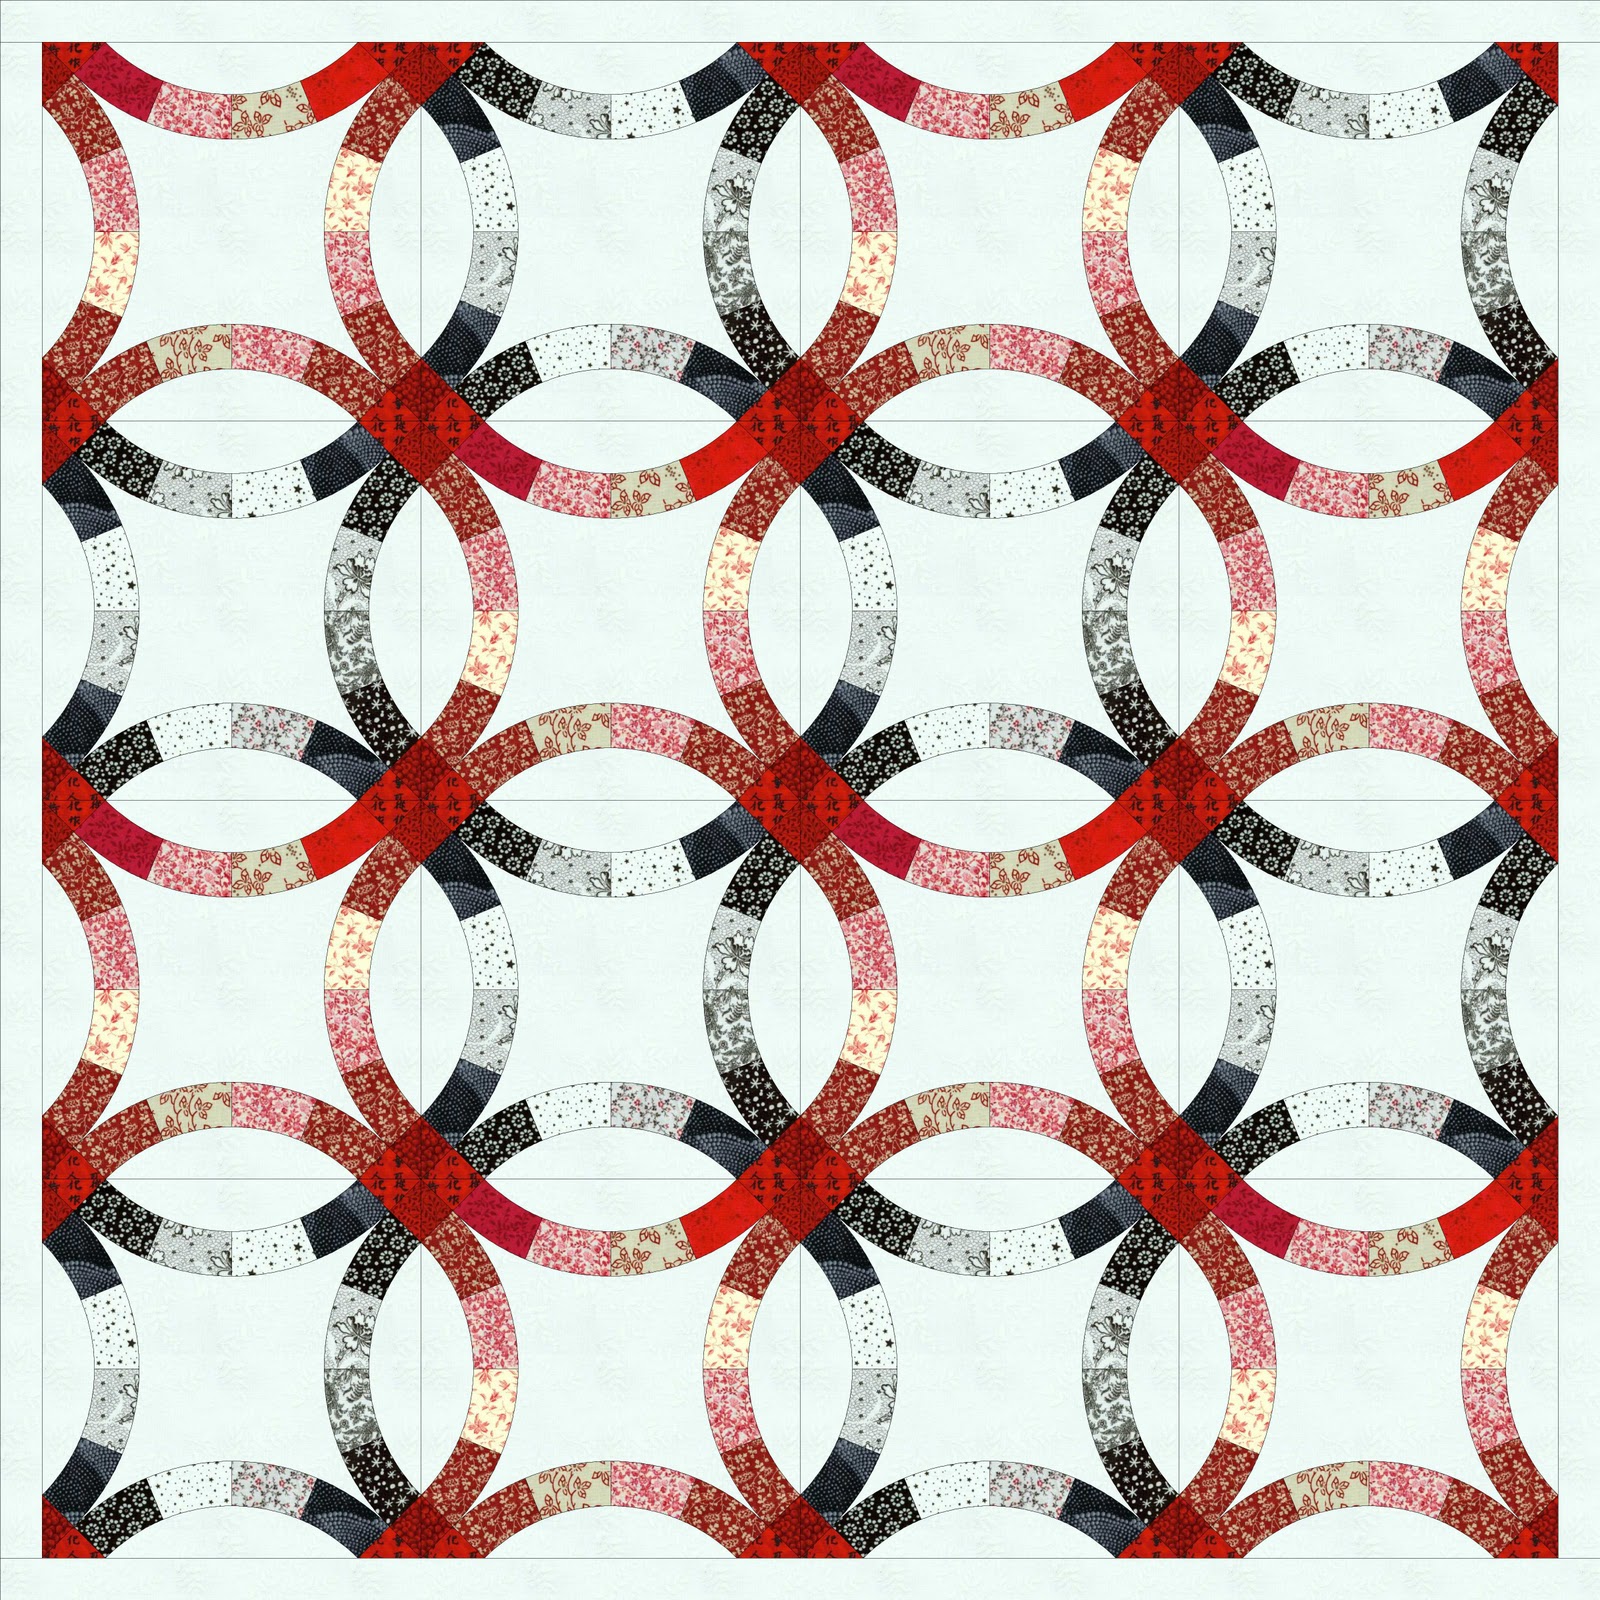
I have a clear vision in my mind of how I want this Double Wedding Ring quilt to look, but I don't want to waste fabric or time by being surprised. So I plugged some fabrics into an EQ project just to see if I'm on the the right track. This is just a quick sketch-- I didn't bother with the borders or with many fabrics. I just wanted to make sure that I want the lighter fabrics in the center of the arcs and the darker ones at the intersections. I LIKE! The arc of the EQ block has a different number of pieces than the AccuQuilt arc. No problem- I just wanted to visualize my design.

For those of you who are not familiar with EQ- it stands for Electric Quilt and products made by the Electric Quilt Company. It's an amazing quilt design software product that is more fun that jumping in a pile of leaves! The version I used today is EQ6. I bought the EQ7 upgrade but I haven't gotten around to loading it yet.
Several people sent me messages about the grain of fabric (see post of Oct 12). I thought I'd talk a little more about it today. It's VERY important that you are aware of how the piece of fabric you are working with related to the bolt before it was cut off. If you no longer have the selvage and can't tell, the easiest way is to tug in both STRAIGHT directions (NOT the bias). One straight way will have some give and one will be stable. The stable direction is the lengthwise grain--- it's the grain that runs the entire length of the bolt. For fun- there's another way. Take a piece of fabric (it can be a fat quarter or larger). Align it so it's straight- with the threads. With your hands pretty far apart, "snap" the fabric. Then hold it the other way and "snap" it. You'll hear a different pitch for each of the tugs. This takes a little practice, but the pitch is lower if you snap it width-wise and higher if you snap it lengthwise. It's like a musical instrument- the width-wise threads have less tension on them than the length-wise threads. The "snap" is also a bit more sharp in the length-wise direction and fabrics with different thread counts have different pitches, too. Cool, huh? Does this qualify as a "parlor trick"? If you know what that is, you're showing your age. I obviously know what that is. :-)

The reason we are talking about this along with the AccuQuilt GO! is that they say you get more accurate cuts if you place the pieces of fabric on top of the shape to be cut as if it was running off the bolt and being fed through the machine. The lengthwise threads will not stretch as they are rolled through. I am assuming that this is more of an issue of the pieces are larger, as they will be when I cut the large center shapes.
When binding a quilt, I generally like to make my own bias strips. If I'm short on fabric (or being lazy) I sometimes use straight binding. I don't recommend this for flannel because folding it along a thread weakens it. It weakens all fabric, but it shows more in flannel. You get that white strip along the fold where the puffy threads separate. If you do use straight binding, you will have a little bit of "give" if you cut the strips width-wise and more stability if you cut them length wise. Your decision. But knowing the characteristics of the fabric help you to make the choice. If you're binding anything that goes around a curve- use bias strips for sure. By the way- the reason we just don't fold the back over the front to bind the quilt is that it won't be bias, and if you ever need to replace it from wear, you won't be messing with the body of the quilt.
When you're concerned about "draping" you need to know the orientation of your fabric. This generally isn't a problem with a quilt because you have the batting and backing and it's all quilted together. But there may be times when it makes a difference if there is very little quilting on your piece. Try to use lengthwise grain strips to make your outer borders- especially if you plan to hang the quilt. It will help to keep it from rippling. There are other tips to avoid that, too-- I'll have to add that to my future posting ideas, as well. Bias is a big deal when making clothing. We've all seen "saggy" sections on poorly made clothing.
The grain of fabric can "talk" to you and help you sometimes. Want to make STRAIGHT crosswise strips? You have to start with straight fabric. Otherwise, you get strips that change direction at the fold and look all wonky.
First, iron the fabric. Then match the selvages. If the piece is large, hold your hands pretty far apart. Now wiggle the top to the left and right with relation to the back.

With selvages even, wiggle back and forth until there is no buckling of the fabric and it hangs nice and straight.

When it hangs nicely, that's where you want it to be. I know that the left and right edges (where they were cut off the bolt) are probably not straight. If you line up the cuts instead of lining up the grain, you'll pay the price. NOTE!!! When the grain is straight, that doesn't necessarily mean the printed pattern will be straight! If you just go with the print, you might end up with a mess. Just one more reason to buy good fabric.

Just take a deep breath and make a new, straight cut on one edge. Now you can work from there. The messy piece you cut off is great for paper piecing. Put it in your scrap basket. You need to align fabric relative to selvages and grain. Aligning anything with the cut edge assumes that the person who cut it was perfect. 'Nuff said.
I see a danger in using the GO! that it's easy to disregard the grain of the fabric. Not good. When we use rotary cutters we generally have some awareness of keeping things pretty straight on our cutting surface relative to the selvages. But if you cut little pieces to put over the die shape (which is the best way I can think of to conserve fabric), you can end up with a quilt made without any regard for the grain. In some cases, this is OK. I'm just saying. This is not the fault of the GO! It's just something we need to be aware of. The machine is only as good as the operator, after all.
Congrats! You made it to the end of a very long post. :-)
11 comments:
Long, maybe, but a very useful post, thanks Sue.
I love how the wedding quilt is going to look, red and black are wonderful together.
Interesting post, thanks. Love the wedding quilt pic!
Great post! I stress grain when I teach piecing and how it can be used to your advantage. Looking forward to a post on other tips to keep edges from rippling!
I so appreciate this post. Grain of fabric attention is something I've been remiss about applying, I needed this!
I guess I get that part right, lol.
I do cut on the straight, usually.
Sometimes when working with scraps, I cut without thinking and realize it when sewing. When I use freezer paper, I lay it out on the straight, but what about hexagons, does it matter?
Debbie
Great information describing lengthwise and crosswise. Very helpful - thanks.
A very informative post.:-) xxx
I think you've made a great point there and I guess that's the trade-off with the GO! You will have more scraps left over and faster cut pieces on the grain or do by hand and no waste, but a LOT slower. Thanks for helping to make us more informed users!
Wow! Thanks for lots of useful information!!!
Thanks for the info on fabric grains. This has always confused me so I appreciate the clarification.
This looks greate, nice to follow what you are doing :-)
Post a Comment